|
|
|
|
|
|
|
|
|
|
|
|

|
|
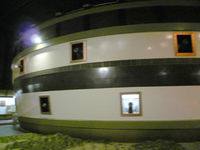
Professor Ching-chih Chen and Director Li Dong-Lai visited The Sea Battle Museum
|
|
Similar
|
Larger
|
Info
|
|
|
|
|
|
|
|
|

|
|
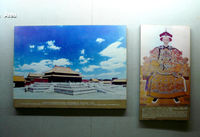
Records describing Lin Zexu's destroying opium on the Humen beach
|
|
Similar
|
Larger
|
Info
|
|
|
|
|
|
|
|

|
|
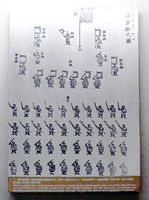
Confidential letter, the Battle of Kowloon, Request for Use of Force
|
|
Similar
|
Larger
|
Info
|
|

|
|
Confidential letter, the Battle of Kowloon, Request for Use of Force
|
|
Similar
|
Larger
|
Info
|
|
|
|
|
|

|
|
The British Orient Expeditionary Army blockaded the Pearl River estuary
|
|
Similar
|
Larger
|
Info
|
|
|
|
|
|
|
|
|
|
|
|
|
|
|
|
|
|
|

|
|
Model at theSea Battle Museum Describing the Postion of Humen Sea War
|
|
Similar
|
Larger
|
Info
|
|

|
|
Model at theSea Battle Museum Describing the Postion of Humen Sea War
|
|
Similar
|
Larger
|
Info
|
|
|
|
|
|
|
|
|
|
|
|
|
|
|
|
|
|
|
|
|
|
|
|
|
|
|
|
|
|
|
|
|
|
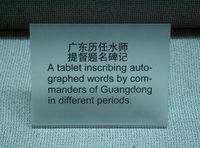
Label of a tablet showing Guangdong commanders' inscribing words in different periods
|
|
Similar
|
Larger
|
Info
|
|
|
|
|
|
|

|
|
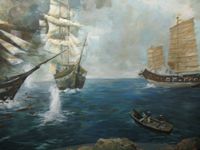
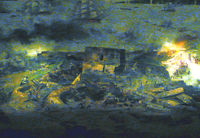
Drawing at the The Sea Battle Museum - Enacting the Humen Sea War
|
|
Similar
|
Larger
|
Info
|
|

|
|
Drawing at the The Sea Battle Museum - Enacting the Humen Sea War
|
|
Similar
|
Larger
|
Info
|
|

|
|
Drawing at the The Sea Battle Museum - Enacting the Humen Sea War
|
|
Similar
|
Larger
|
Info
|
|

|
|
Drawing at the The Sea Battle Museum - Enacting the Humen Sea War
|
|
Similar
|
Larger
|
Info
|
|

|
|
Drawing at the The Sea Battle Museum - Enacting the Humen Sea War
|
|
Similar
|
Larger
|
Info
|
|

|
|
Drawing at the The Sea Battle Museum - Enacting the Humen Sea War
|
|
Similar
|
Larger
|
Info
|
|

|
|
Drawing at the The Sea Battle Museum - Enacting the Humen Sea War
|
|
Similar
|
Larger
|
Info
|
|
|
|
|

|
|
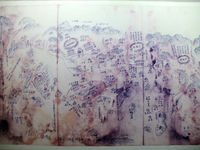
Zhenyuan Fort in Dongyueshan hill, and detailed illustration of Cengang Fort
|
|
Similar
|
Larger
|
Info
|
|
|
|
|
|
|

|
|
British Chief Superintendent of Trade to China, Charles Elliott
|
|
Similar
|
Larger
|
Info
|
|

|
|
British cabinet session decided to commit aggression against China
|
|
Similar
|
Larger
|
Info
|
|

|
|
Charles Elliott and British cabit's decision to commit aggression against China
|
|
Similar
|
Larger
|
Info
|
|
|
|
|

|
|
Label on Guan Tianpei's "A Tentative Collection on Preparing for Coastal Defense"
|
|
Similar
|
Larger
|
Info
|
|

|
|
Guan Tianpei's "A Tentative Collection on Preparing for Coastal Defense"
|
|
Similar
|
Larger
|
Info
|
|

|
|
Guan Tianpei's "A Tentative Collection on Preparing for Coastal Defense"
|
|
Similar
|
Larger
|
Info
|
|
|
|
One of the drawings in Guan Tianpei's "A Tentative Collection on Preparing for Coastal Defense"
|
|
Similar
|
Larger
|
Info
|
|

|
|
One of the drawings in Guan Tianpei's "A Tentative Collection on Preparing for Coastal Defense"
|
|
Similar
|
Larger
|
Info
|
|

|
|
Label describing Yao Huaixiang refused British demand on British Wilish
|
|
Similar
|
Larger
|
Info
|
|
|
|
|
|
|
|
|
|
|
|
|
|
|
|
|
|

|
|
A tabular listing of the British “Orient Expeditionary Army” military capability
|
|
Similar
|
Larger
|
Info
|
|
|
|
|
|
|
|
|
|
|
|

|
|
Great disparity in numerical strength of the Chinese vs British military forces in Shajiao War
|
|
Similar
|
Larger
|
Info
|
|

|
|
Great disparity in numerical strength of the Chinese vs British military forces in Shajiao War
|
|
Similar
|
Larger
|
Info
|
|
|
|

|
|
Introduction on the tombstone "The Righteous Soldiers and Moral Tombs"
|
|
Similar
|
Larger
|
Info
|
|
|
|
|
|
|
|

|
|
Description of Chen Liansheng's war horse, called "moral horse"
|
|
Similar
|
Larger
|
Info
|
|

|
|
Part of the stone tablet - Chen Liansheng's war horse, called "moral horse"
|
|
Similar
|
Larger
|
Info
|
|

|
|
Part of the stone tablet - Chen Liansheng's war horse, called "moral horse"
|
|
Similar
|
Larger
|
Info
|
|

|
|
Part of the stone tablet - Chen Liansheng's war horse, called "moral horse"
|
|
Similar
|
Larger
|
Info
|
|

|
|
Part of the stone tablet - Chen Liansheng's war horse, called "moral horse"
|
|
Similar
|
Larger
|
Info
|
|

|
|
The stone tablet - Chen Liansheng's war horse, called "moral horse"
|
|
Similar
|
Larger
|
Info
|
|
|
|

|
|
Shuikengkou - the place that British troops landed on Hong Kong
|
|
Similar
|
Larger
|
Info
|
|

|
|
Sculpture of the brave Chinese fighters against British in Shajiao
|
|
Similar
|
Larger
|
Info
|
|
|
|
|
|

|
|
Description of the stone sculpture "The Righteous Soldiers and Moral Tombs"
|
|
Similar
|
Larger
|
Info
|
|

|
|
Description of the stone sculpture "The Righteous Soldiers and Moral Tombs"
|
|
Similar
|
Larger
|
Info
|
|
|
|
|
|
|
|
|

|
|
"Treaty of Nanjing" signed with the British government by the Qing government
|
|
Similar
|
Larger
|
Info
|
|

|
|
"Treaty of Nanjing" signed with the British government by the Qing government
|
|
Similar
|
Larger
|
Info
|
|
|
|
|
|
|
|
|
|
|
|
|

|
|
Lin Zexu's bronze statue at the Exhibition Hall of the Sea Battle Museum
|
|
Similar
|
Larger
|
Info
|
|
|
|
|
|
|
|
|
|

|
|
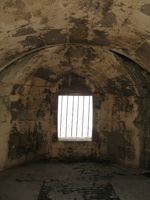
Introduction to the Humen Fort's batteries and how battles were fought
|
|
Similar
|
Larger
|
Info
|
|

|
|
Introduction to the Humen Fort's batteries and how battles were fought
|
|
Similar
|
Larger
|
Info
|
|
|
|
|
|

|
|
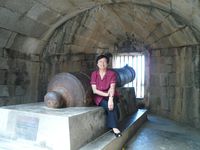
Introduction to the 4000 sma-jin front-bore cannon at Weiyuan Fort
|
|
Similar
|
Larger
|
Info
|
|
|
|
|
|
|
|
|

|
|
Introduction to the 8000 sma-jin front-bore cannon at Weiyuan Fort
|
|
Similar
|
Larger
|
Info
|
|
|
|
|
|
|
|
|
|
|
|
|
|
|
|
|
|
|
|
|
|
|
|
|